
A quick and dirty post on running the Juniper vQFX on VMWare ESXi.
You might be wondering why ESXi seeing as we’re all cloudy types. ESXi is purely a case of laziness. Each server in my control has ESXi 6.5 installed. This becomes tin management at the most basic level.
Part of my home network has a DMZ which has several public IP addresses and I expose systems and VNFs externally over the internet. More recently thanks to the IP fabric craze, part of what I’m exploring is easy integration and feature enhancement on Juniper vQFX instances. Two choices exist:
- Install vQFX on servers with KVM
- Install on ESXi
I went for the easy ground (because why make it harder than it has to be?) Turns out, it wasn’t as straight forward as it should be, although not difficult. Just a niggle.
Installation Process
Grab yourself the RE and PFE images from the Juniper download site: https://www.juniper.net/support/downloads/?p=vqfxeval I Grabbed the 18.1 RE and the 17.4 PFE image.
Next, extract the two .vmdk files from the .box files. You can use the trusty tar tool to extract the files required. Below are two files I downloaded from the Juniper site and renamed for clarity.
Run the tar -xzf <file> in each directory. Your outcome will look like below:
├── PFE
│   ├── Vagrantfile
│   ├── box.ovf
│   ├── metadata.json
│   ├── packer-virtualbox-ovf-1520879272-disk001.vmdk
│   └── vqfx-pfe-virtualbox.box
└── RE
    ├── Vagrantfile
    ├── box.ovf
    ├── metadata.json
    ├── packer-virtualbox-ovf-1524541301-disk001.vmdk
    └── vqfx-re-virtualbox.box
One requires step here is to run the .vmdk file through the vmkfstools tool on an EXI machine. Here’s the command I used for that. This tool converts the disk back to being thin provisioned.
vmkfstools -i <input_filename> <output_filename> -d thin
If you do not do this step, the VMs still boot, however I also saw some write errors to disk. I can’t comment any further beyond seeing some error messages due to time investigation time constraints.
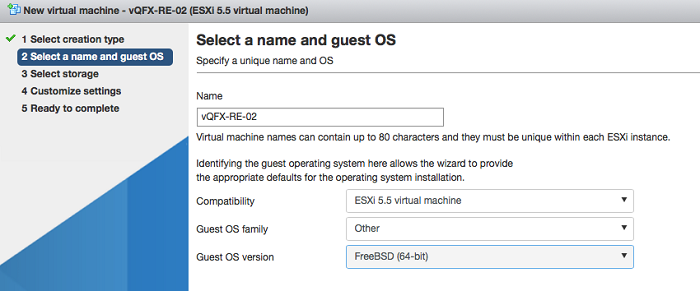
Next, to try and figure out what each VM needs and what operating system it runs on, take a sneaky peak inside each of the box.ovf files. By looking inside the RE OVF file we know it’s a FreeBSD Operating system with an IDE disk controller. Ok. We can also see what see the requirements for vCPU and RAM.
Here’s the resulting data needed to build those VMs.
RE:
    CPU:        1
    RAM:        1024 MB
    OS:         FreeBSD
    DiskCtl:    IDE, Controller0 Master
    NICs:       Management, Internal
    Type:       VMvware 5.5 (type 11)
PFE:
    CPU:        1
    RAM:        2048
    OS:         Ubuntu x64
    Diskctl:    IDE, Controller0 Master
    NICs:       Management, Internal, Revenue(n)...
    Type:       VMvware 5.5 (type 11)
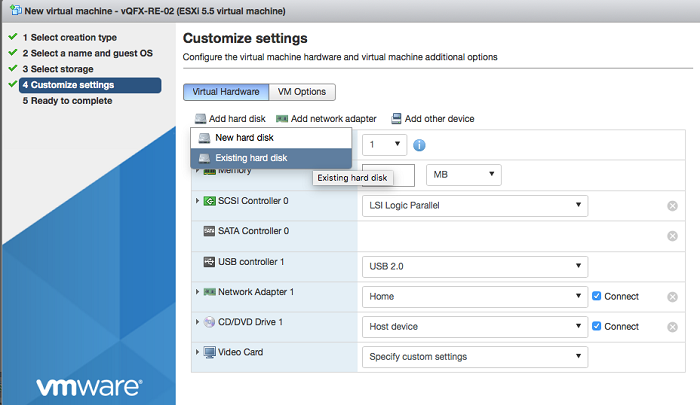
Now you can use the WebUI or vmtools CLI and build virtual machines. I had issues running these VMs as version 6.5, but I can confirm they work just fine as 5.5!
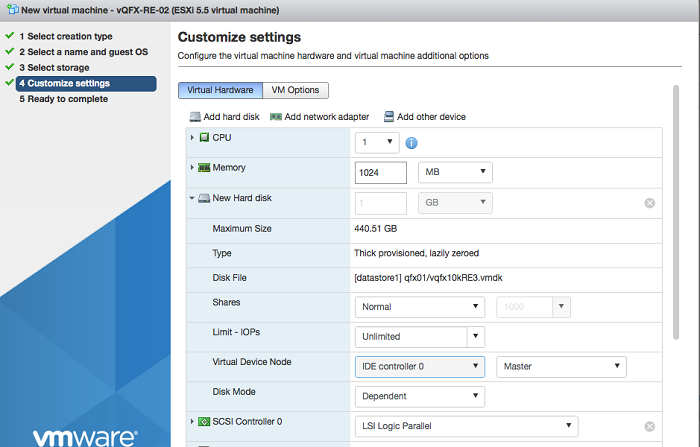
Here’s another showing how to set up the disk controller, CPU and RAM.

One final set of warnings. When launching the VMs, sometimes the NIC order changes. Ensure the ordering of NICs:
- Management NIC
- Internal NIC (on own vSwitch with 9000 byte MTU)
- For PFE port three onwards are revenue ports
Also, the availability of the PFE for 18.1 isn’t there yet, so I used the 17.4 PFE. It is normal to have semantic version mismatches between the RE and PFE virtual machines, so don’t worry!
Finally finally, this is a community supported project, so please do not moan at Juniper or your account manager!
Enjoy.